Tutorial Submitted by :: susanmj
Creating Forms in SiteBuilder
1. To create a form in SiteBuilder it is helpful if you first sketch it out on paper so you know what
fields you will want on the form. Ex: Name, Address, etc.
2. Click on the Communication link in the toolbar.
3. From the drop down list select the first element you want to use.
When an entry is made by a visitor the text boxes will auto-expand to the width you set in the Properties Editor.
4. On the Properties Editor enter the Max # of characters that can be entered in the box. Click the Required Field box to prevent the viewer from skipping information you require and enter the error message you want to appear if a required field isn't answered.
Normally you will not enter anything in the first item, Text, as that is where your viewer's answer will appear.
5. Next to the box, using plain text, identify the box.
6. Follow this process for each box or entry you want on your form. Once complete be sure to add the Submit option and enter the information on the Properties Editor for it.
A SAMPLE FORM:
Name
Address
City
State
Zip
Select your choice
Choose one from the list
Setting the Tab Order:
To set the order in which the form will tab, right click on the form element you want to be first (ex: Name) and choose Element Layer Order under Format in the top toolbar - Select Bring to Front - Do this for each element in the order you want them to tab.
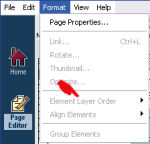
Select Element Layer Order
You can add design elements to match the look and feel of your site and to help make the form stand out from the rest of the page content.
Copyright 2006 - Homestead Connection - All Rights Reserved
Homestead Website Design and SEO - S&J Enterprises
Use the internal search feature to the right or the site map for easy access to information.
 | ||||